Saturday, March 3, 2012

Laundry With a Side of Tahitian Treat


I enjoy doing the laundry...
I know, that sounds crazy...
there's just something about
 taking something dirty and smelly
 and making it clean and fresh. 
There's a rhythm to laundry that brings me peace. 
Over the years I've gathered an arsenal of products
  to win the war on stains...
But I think the thing I like best about doing laundry
 is Tahitian Treat soda...
Let me explain...

  When I was a girl I grew up in a home with a working washer and dryer. The only problem was no one used it on a regular basis. No, I was not raised by wolves...just two very busy parents of six kids working hard to make ends meet. My parents loved all six of us and we all knew it, but they worked so hard outside the home, when they got home there was very little time and energy left for running a house.The laundry was always in huge piles and clothes were usually washed on an as-needed basis. But every month or so my parents would decide it was time to catch-up on the the laundry.

  By the time I turned 11 it became my job to tackle the laundry mountain. About once a month or so I would be dropped off at a coin laundromat with 8 or 9 large garbage bags full of dirty laundry and a couple of rolls of coins. My job would be to spend the day washing, drying, and folding huge piles of laundry. You might think it was a punishment, but to the contrary, I preferred that job to whatever monthly cleaning project was going on at home.
 Of course those were the days before handheld video games, Kindles and cell phones, but I enjoyed my time away from the house full of brothers and sisters. I read paperbacks, worked word search puzzles, read old issues of Reader's Digest, and began a lifelong hobby of people watching. On any one of those Saturdays I might be dropped off at 10 am and finally get done with all the laundry by 3 or 4 in the afternoon. There was something so satisfying as high piles of towels, underwear, shirts, and jeans would tower on the folding tables. With every bag I refilled with folded clean clothes I felt a sense of accomplishment at a job well done.
  Imagine how other customers felt when they walked in to find all the machines full! But in reality I rarely got to the machines first so I'd have to wait until one was empty and snag a machine. A couple of years into my laundry experience a bright shiny new laundromat was built a few miles away. The new one had rows and rows of huge triple-size machines and cut down the amount of time I was spent doing laundry. Doing the laundry held much less excitement for me when the new machines came along.
  I don't think any of my brothers or sisters envied my days at the laundromat, but that was okay...as a middle child I relished the time away. One of my favorite memories of Saturdays at the laundromat was using some of the coins to buy myself a candy bar and a cup of Tahitian Treat soda pop. The laundromat had a really nifty vending machine that would automatically drop a paper cup down into a holder, then drop in some crushed ice, and a mixture of syrup and water ~ It was a bright red fizzy fruit punch. It tasted soooo good on those long hot days. Honestly, I'm sure I helped myself to more than one cup of that wonderful stuff. It had a lot of fizz and the sweetness of the soda along with the texture of the crushed ice made it the perfect pleasure.

  Recently I found Tahitian Treat in 2-liter bottles at my local grocery store. I bought a bottle and found it tastes just as I remember it. I like to pour it in a glass with crushed ice...it takes me right back to those days when doing the laundry actually felt like an escape. I think I know why I really like doing the laundry (it's not really an OCD thing)...somehow it feels like a treat!


Friday, March 2, 2012

Nutter Butter and Chocolate Covered Banana Pudding

It's time to go over the river and through the woods again to have dinner with our daughter-in-law and 4 grandkids in their log cabin in the woods. This week I'm bringing Crescent-topped Casserole and for dessert I bringing this yummy, gooey, delish dessert. This morning as I was deciding what to take for dessert I looked through my pantry and I spied a package of Nutter Butter peanut butter sandwich cookies left over from some Christmas projects I did with the grandkids. That got my wheels turning, so I looked around and found a couple of other tasty ingredients and before you know it I had put together a whole new dessert.

This is how I started...

I gathered these ingredients: Nutter Butter cookies, two packages of Jello instant banana pudding mix, 5 bananas, lemon juice, butter, and Cool Whip.

At this point I was debating about doing a layered dessert in individual cups with lids, but I thought better of it. I decided to use a glass 9x13 pan so I would have only one dish to carry. I think this recipe would look nice in a stemmed glass or a trifle bowl, but today I used a glass pan.

I put the whole package of cookies in my food processor and pulsed until they were fine crumbs. Then I melted 6 tablespoons of butter in the microwave and poured it into the processor and mixed it thoroughly into the cookie crumbs.

Next I sliced the bananas and sprinkled them with lemon juice. I used about 2 tablespoons of juice for 5 bananas. I stirred the sliced bananas gently in the lemon juice to make sure all surfaces were covered.

I put aside about 2 tablespoons of the cookie crumbs to use as a decoration on the top and then I put 1/2 of the remaining cookie crumbs into the bottom of the glass pan. Then I spooned 1/2 of the bananas on top of the crumbs. I tried to make sure I didn't get any of the lemon juice on there ~ I tried to leave as much lemon juice as I could in the bowl since I didn't want the lemon flavor, just the citric acid to prevent the bananas from browning.

This is where I decided to add something else...I had a jar of Saunder's Hot Fudge sauce in my refrigerator, so I decided to microwave it and pour it over the bananas.

I had about 3/4 of a jar in my fridge and I used 1/2 of it for this layer. (If I had a full jar I would have used 1/2 of the full jar for this layer.)

Next, I made the instant banana pudding according to the package directions for pie ~ using 3 cups of cold milk for two boxes of mix. Then I poured 1/2 of the pudding mix on top.

I repeated the layers with the remaining cookie crumbs (except for the ones I set aside for the top), the bananas, the chocolate fudge and the banana pudding. Then I spread the Cool Whip over the top making sure it touched all the edges to seal. (I used Cool Whip Lite...that makes this good for you, right?) And then I sprinkled on the reserved cookie crumbs, and refrigerated this until it was time for me to take this to my taste testers (about 4 hours).

Here is the recipe for Chocolate Covered Banana and Nutter Butter Pudding

1 package Nutter Butter Sandwich Cookies
6 tablespoons butter, melted
5 bananas, peeled and sliced
2 Tablespoons lemon juice
1 jar Hot Fudge ice cream topping (I like Saunder's best)
2 packages Jello instant banana pudding
3 cups cold milk
8 oz Cool Whip

Pulse cookies in a food processor until fine crumbs. Add melted butter and pulse until thoroughly combined.
Take 2 tablespoons of the cookie crumb mixture out and set aside.
In a 9x13 glass container, spread 1/2 of remaining cookie crumb mixture.
In a separate bowl, put sliced bananas and lemon juice. Stir gently to cover bananas with juice. Pour off and throw away as much juice as possible. Spoon 1/2 of the juice covered banana slices on top of the cookie crumbs.
Warm hot fudge sauce in the microwave and then pour 1/2 of it over the bananas.
In a large bowl, mix the pudding mix and the milk with a whisk for about 2 minutes, or until fully dissolved.
Pour 1/2 of the pudding mixture over the chocolate covered bananas.
Repeat the layers with remaining cookie crumbs (except for the ones held out for decoration), bananas, hot fudge sauce and pudding.
Cover the top with Cool Whip.
Sprinkle with reserved cookie crumbs.
Refrigerate for at least 4 hours.


This is a perfect bite of creamy, crunchy, ooey, gooey, scrumptious goodness!

What was the taste tester's bottom line?
My taste testers were very happy with this dessert. The Nutter Butter cookies did not give it as much of a peanut butter taste as I expected, but the flavor  and texture of the cookie crumbs was good. This dessert-with-a-long-name got a thumbs-up from everyone for taste. Some even asked for seconds. It is rich, so having a cup of coffee with it is probably a good idea.

The bottom line: I would make this again ~ but I may have to come up with another name for it. What do you think would be a good name?

Thursday, March 1, 2012

Crescent Topped Italian Casserole

Would you like a recipe for an easy, delicious casserole? This is a nice casserole for pot luck dinners, quick weeknight dinners, and even a nice dinner for entertaining. It is hearty and filling for a cold winter evening, or for filling what seems like the bottomless pit of a teenage boy's stomach. GoodMan and I took this casserole over to our son and daughter-in-law's log cabin in the woods. Unfortunately the lighting at their house is not the best for photography, but take my word for it, this casserole tastes great and looks appetizing on the plate.

I made this casserole at my house and then took it to the log cabin. This is how I got it ready to go...

I got these items together: 2 pounds of lean ground beef, 1 package of dry spaghetti seasoning, 1-15 ounce can of tomato sauce, 1 onion (3 cloves of garlic I forgot to put on the tray), sour cream, (mozzarella cheese I forgot to put on the tray) Parmesan cheese, and Pillsbury Recipe Creations Crescent Dough.

I started by browning the ground beef with the chopped onion and garlic on top of the stove.

When it was browned I made sure to drain, baby, drain...look at all the fat and moisture that was drained off!

Really, check this out...this is the fat and moisture I drained off the meat. And that was ground round which is pretty lean...If you're ever inclined to just skip the drain-baby-drain step...DON'T!

I put the meat back in the pan and added the tomato sauce and powdered spaghetti seasoning and then stirred and simmered everything for about 5 minutes. This is very thick and not very saucy.

I took the pan off the stove and stirred in 3/4 cup of sour cream. This gives the sauce a creamy pink color.

I poured the meat sauce into a 9x13 glass pan (remember ~ it is very thick) and sprinkled 2 cups of mozzarella cheese to cover the top of the meat sauce.

Next, I covered the top of the cheese with the crescent dough, sprayed it with buttery spray (like PAM) and sprinkled grated Parmesan cheese on top.

After baking it for 30 minutes at 375 degrees I pulled it out of the oven...see how golden the crust is? Notice the bubbly edges...Yum!


See the difference in the lighting? I wish I could show you how it looks in regular light...but again, take my word for it...it doesn't look quite so GOLD!
More softly golden with a rosy meat layer and a gooey white cheese layer. It cuts nicely into squares and tastes wonderful with a side salad or steamed vegetables.

Here is the official recipe for Crescent Topped Italian Casserole:

2 pounds lean ground beef
1 onion, chopped
3 cloves garlic, minced
1- 15 oz can of tomato sauce
1 package dry spaghetti sauce mix
3/4 cup sour cream
2 cups mozzrella cheese, shredded
1 package Pillsbury Recipe Creations Crescent Dough
PAM buttery spray
1 tablespoon shredded Parmesan cheese

In a pan on top of the stove, brown ground beef with onions and garlic. Drain.
Add tomato sauce and dry sauce mix and simmer for 5 minutes. Remove from heat. Stir in sour cream.
Pour meat mixture into a glass 9x13 pan. Top with mozzarella cheese. Cover with the crescent dough. Spray top with buttery spray and sprinkle Parmesan cheese on top.
Bake at 375 for 30 minutes. Let stand for 10 minutes before cutting.

What is the taste tester's bottom line?
This is a tried-and-true recipe for our family. I've made this one for many years. I think I originally got this recipe from a sports potluck I attended when my older boys were in high school...that makes it almost 20 years old...Wow! Where has the time gone?

The bottom line: Keep this in the menu-plan rotation about once a month and keep it in mind for potlucks. It's a good casserole when you want to take a meal to someone.

Wednesday, February 29, 2012

Meatball Muffins


Look at that! Isn't it fun?!!

  Last week I saw a picture of Spaghetti and Meatball Cups from www.emilybites.com on Pinterest. Emily's blog tag line says "Lightened up recipes from my kitchen to yours!" She works on recipes that work well for a Weight Watchers diet.  I encourage you to check out her site. That said, I used Emily's idea as a jumping off point for a recipe I thought my grankids would enjoy. My version is not as low calorie, or as low fat at Emily's
  I made these Meatball Muffins last weekend when GoodMan and I were babysitting 5 of our grandchildren. Kids really enjoy a fun presentation! Our 7-year-old grandson, Ayden, really was impressed. As he saw me bringing in the platter of Meatball Muffins he smiled so big and said, "Gramma, those are GREAT!" I laughed and said, "I guess I'll be getting a thumbs-up for this recipe." And without skipping a beat his face turned serious and he said, "You'll have to wait until I TASTE them before I can give it a thumbs-up!" I guess he takes his job as taste tester very seriously!!

Join me as I make Meatball Muffins and see what my taste testers had to say...


These are the ingredients I gathered to make the meatballs for the Meatball Muffins: 2 pounds lean ground beef, 2 eggs, 3/4 cup french fried onions (like you use for green bean casserole ~ I had leftovers of the fried onions and needed to use them up. You could just finely chop an onion or use onion seasoning.), 3/4 cup oats, 1 tablespoon Tastefully Simple's Garlic-Garlic, and 1 1/2 teaspoons Tastefully Simple's Seasoned Salt. You could use other brands of seasoning ~ probably use less garlic if you're using garlic powder, like about a teaspoon.

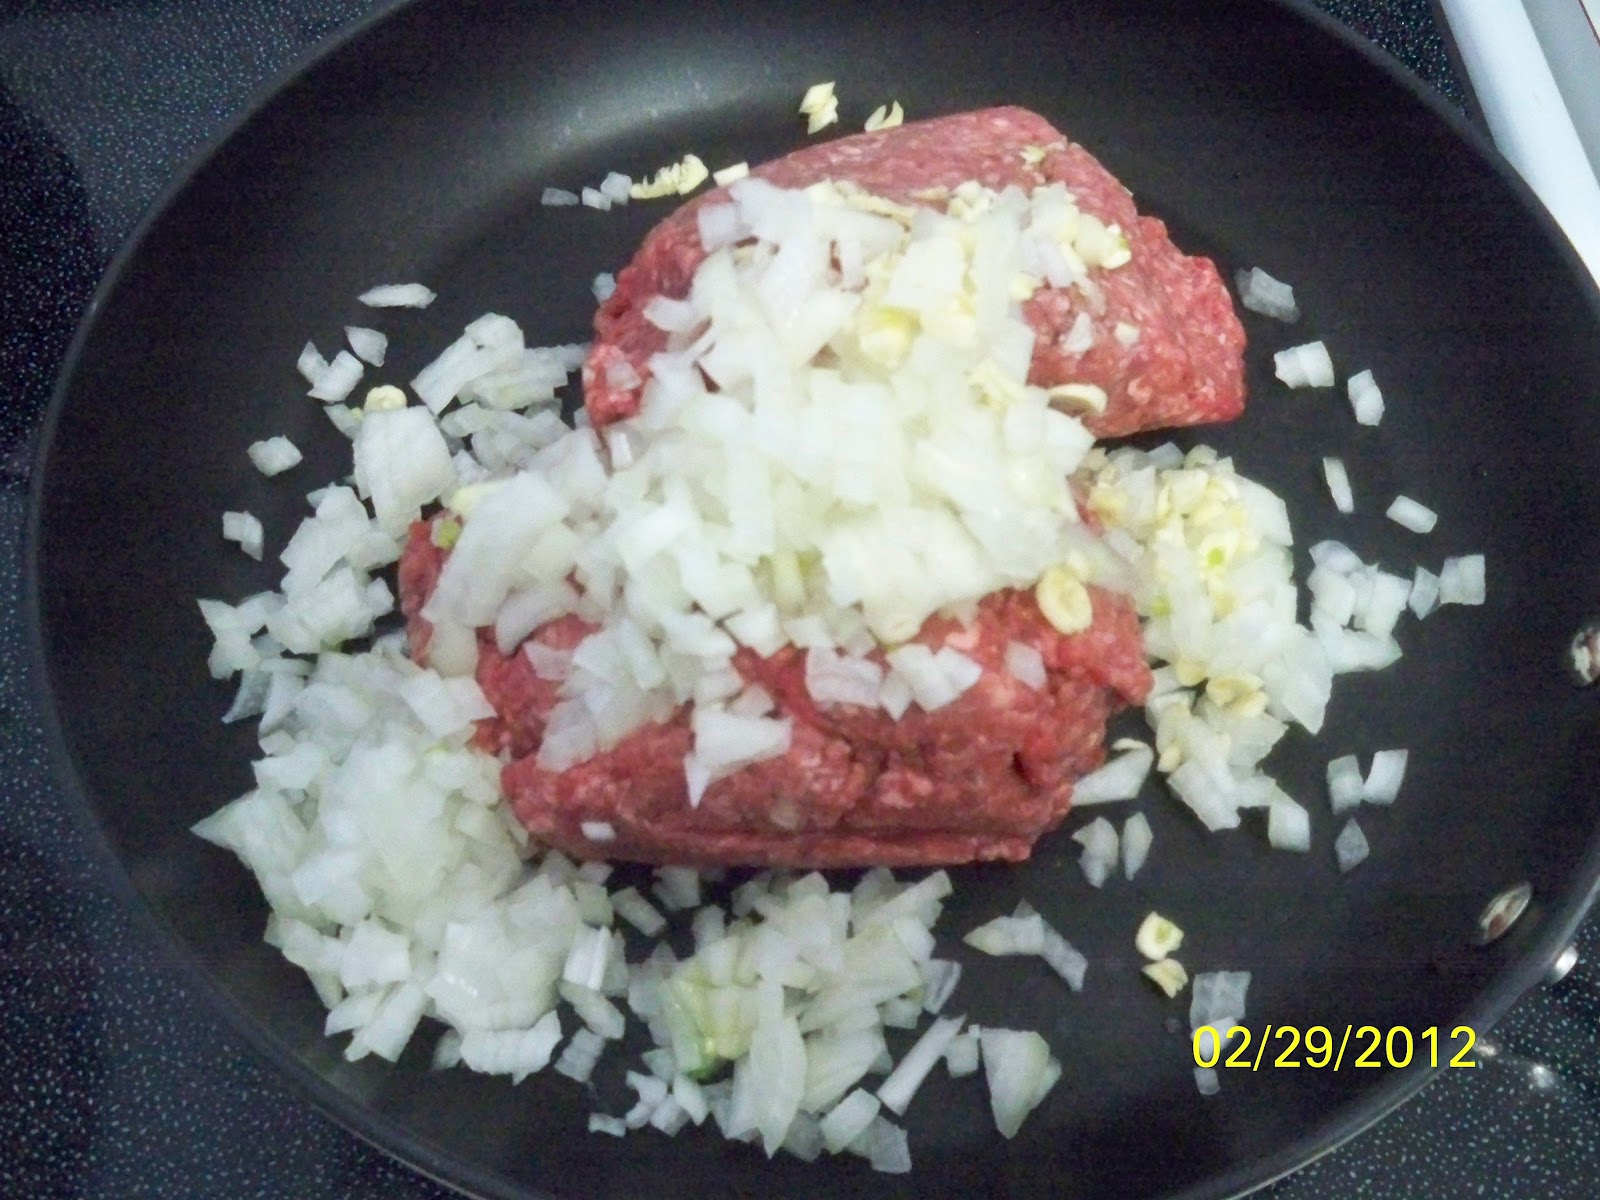
This is a basic meatball or meatloaf recipe. I didn't take pictures of all the steps. I just mixed all the ingredients in a large bowl until everything was evenly distributed.

I made the meatballs a little smaller than the size of a large egg (notice how I put an egg on there to give you some reference? ~ Don't cook an egg with the meatballs!) and I put them on a baking sheet lined with my favorite silicone sheet. If you don't use silicone I would suggest a light spray of PAM or a parchment paper. I put them in a 350 degree oven for 35 minutes.

This is how half of the meatballs looked when I took them out of the oven...I forgot to take a picture of the meatballs until after I started taking them off the pan...Oops! The other half looked just like 'em.


While the meatballs were baking I gathered the ingredients for the spaghetti muffins: 7 oz spaghetti, 2 eggs, grated Parmesan cheese, shredded mozzarella cheese, and my family's favorite spaghetti sauce ~ Ragu Chunky Garden Style sauce.


I put the spaghetti sauce into a large saucepan and added the cooked meatballs. I turned the stove on low, just to simmer the meatballs with the spaghetti sauce.

I cooked the spaghetti and drained it. I also rinsed it with cold water to make the spaghetti easier to handle.

In a large bowl, I mixed the 2 beaten eggs, spaghetti, Parmesan cheese, and mozzarella cheese.


I turned the oven up to 400 degrees. Then I sprayed a regular size muffin tin with PAM and put about 1/2 of a cup of the spaghetti mixture in each muffin space. I formed a cup by pushing the spaghetti up the sides. I put them in the oven and baked them for about 20 minutes. I kept checking on them to make sure the edges were not getting too crispy because I didn't think my taste testers would like their spaghetti crispy. Mine did not become too dark on the edges, but I had decided if they seemed to be getting too dark on the edges before the centers seemed cooked I would cover them with foil part way through. It is important not to reduce the cooking time because you want the eggs to be thoroughly cooked.

I waited about 3 minutes before I popped them out of the muffin tin. I was surprised at how nicely they held together!


I then filled each spaghetti muffin with one meatball and a spoonful of spaghetti sauce. I sprinkled shredded Parmesan cheese on top and they looked so cool! I kept extra spaghetti sauce on the table for those who prefer more sauce.


Recipe for Meatball Muffins
(Makes 24 muffins ~ this recipe can easily be cut in half, but the leftovers were really good!!)

For the meatballs:
2 pounds lean ground beef
1 cup french fried onions, crumbled
1 cup quick oats
2 eggs, slightly beaten
1 Tablespoon Tastefully Simple's Garlic-Garlic (or 1 teaspoon garlic powder)
1 1/2 teaspoon Tastefully Simple's Seasoned Salt
Large jar Ragu Chunky Garden style spaghetti sauce


Preheat oven to 350 degrees. Prepare a baking sheet with PAM or silicone sheet. In a large bowl, mix all ingredients. Roll mixture into 24 large meatballs. Bake for 35 minutes, or until browned and cooked through.
Put the spaghetti sauce into a large saucepan and add the cooked meatballs. Simmer the sauce and meatballs while the spaghetti muffins are baking.

For the spaghetti muffins:
7 oz box of spaghetti; broken into thirds, cooked, drained, and cooled
2 eggs, beaten
1/2 cup grated Parmesan cheese
1 cup shredded mozzarella cheese

Prepare muffins tins by spraying with PAM.
When the meatballs are out of the oven, turn the oven temperature up to 400 degrees. 
In a large bowl, combine the muffin ingredients.
Use about 1/2 cup of spaghetti mixture per muffin. Push spaghetti against the sides of the muffin tin to form a cup shape.
Bake 20 minutes. Watch for excessive browning. Cover with foil part way through if they brown too quickly.

Serve by placing one large meatball in each muffin cup and spoon spaghetti sauce over the top. I added a sprinkle of shredded Parmesan cheese just for an added garnish.


What is the taste tester's bottom line?
This was a big hit with my taste testers, the little ones and the big ones!
The kids had fun eating them with their fingers like a muffin (Hey! They're at Gramma's house ~ they can get away with it!) and even Goodman got in on the act!

Here are just a few of my testers!

This is Ayden. I earned the thumb's-up after all!!

The bottom line: This goes on to the menu rotation for days when the grandkids will be over. It would also be good in mini muffin tins with smaller meatballs for an appetizer.


Tuesday, February 28, 2012

Round Two Rice Pudding


In my experience there are two types of rice pudding...the good kind, and the even better kind. I can't remember ever tasting a rice pudding I didn't like. I like some better than others ~ for example, I will eat Kozy Shack's rice pudding found in the refrigerated pudding section of the grocery store, but it doesn't compare to home made rice pudding. Some rice puddings taste like vanilla pudding with rice and cinnamon added. Some have raisins, some are heavily spiced with nutmeg. Others are more like a layer of rice topped with a layer of custard...That is my favorite kind.

My grandmother used to make rice pudding as a way to use up leftover rice. In my house I look forward to rice leftovers so I can make my Round Two Rice Pudding. I routinely plan extra rice into my menu plan just so I can make this comforting dish. And I'll let you in on a little secret...I usually don't eat it for dessert. My favorite way to eat this custard style rice pudding is as a cold breakfast dish.

Let me take you on a journey to The Best Rice Pudding You'll Ever Eat...

I start by whisking 4 eggs in a 3 quart casserole dish.

I add one cup of sugar and whisk it again.


Next comes the previously cooked (and cooled) white rice. I use about 2 cups of rice, less if I don't have that much leftover. If you like more custard and less rice use about 1 1/2 cups. If you like a lot of rice use up to 3 cups of rice (any more than than and it turns into a rice block). If I was using raisins I would add them at this time. I'm not a big fan of cooked raisins, so I leave them out.


I stir in 4 cups of milk. Of course whole milk gives a richer custard, but I almost never have that in the house so I just use the 1/2% milk I have on hand and it always tastes wonderful!


I add a generous teaspoon of vanilla (really about a teaspoon and a half). And I give everything a gentle stir to combine all the ingredients.


I sprinkle nutmeg all over the top. If I had to give a measurement I would estimate about 1/2 teaspoon.


Then I sprinkle cinnamon on top of that. I would estimate another 1/2 teaspoon of cinnamon.

Now it's ready to go into a 325 degree oven for anywhere from 70 - 90 minutes. I don't know why there is such a big variation on the time, but I just start checking it at 70 minutes and then about every 5 minutes until it looks like the center is setting up. You'll know it's done when a knife inserted in the center comes out almost clean. This one took 85 minutes.


I wish you could smell this...nutmeg, cinnamon, mmmm...I put this on my cold porch in hopes it will cool soon so I can break into it and scoop out a dish ~ just so I can take a picture of it for the blog...but I'll eat it 'cuz it's calling my name!!


Round Two Rice Pudding Recipe:

4 whole eggs
1 cup granulated white sugar
2 cups white rice, cooked and cooled
4 cups milk
1 teaspoon vanilla
1/2 tsp ground nutmeg
1/2 tsp ground cinnamon

Preheat oven to 325 degrees.
In a 3 quart glass casserole dish, whisk eggs. Add sugar and whisk again. Stir in rice, milk and vanilla. Sprinkle nutmeg and cinnamon on top.
Bake for 70 - 90 minutes, until center seems set and knife inserted in the center comes out clean.
Enjoy warm or cold.
Refrigerate leftovers.

What is the taste tester's bottom line?
This is a recipe my gandmother used, so I would say it has passed the generational taste test. My mother is 85 and now lives 3 hours away, but when she lived down the street from me I would bring her a big dish of this every time I made it because it is one of her favorites too.

The bottom line: Always make more rice than you plan to use.

Monday, February 27, 2012

It's Not Done Until It's Done

A mountain of clean pots and pans 
are stacked on my kitchen counter.

Three baskets of clean and folded laundry
take up space on my bedroom floor.

There's a vacuum sitting quietly on my clean livingroom rug.

I've been working hard all day...as anyone would be able to tell
just by looking at the evidence I've left behind.

Why is it I can wash the stack of pots and pans,
but not put them in their cupboards?

Why is it I can wash, dry, and fold the laundry,
but not put them in their dresser drawers?

Why is it I can haul the vacuum out and vacuum the livingroom rug,
but I leave the vacuum in a corner of the room?

Like a child looking for some recognition...

I see my counter of clean dishes and sigh as I think,
"What a good job that was!
 Look how much work I did today."

I see all the clean laundry folded in the baskets and I think,
"Wow, that took a lot of time!
Good job Denise, you sure were busy today!"

I see the vacuum standing at attention and it says to me,
"Today is the day the vacuuming was done!
You don't have to do that again for a while."

I need to remind myself...

The dishes aren't done until they are put away.

The laundry isn't done until it is put away.

The vacuuming isn't done until the vacuum is put away.

It's not done until it's done.


(Sometimes acting like a grown-up is a drag.)